I get to visit a lot of gardens and am asked many questions about all things gardening.
There are quite a few issues that I regularly see crop up. Here are my top ten mistakes that I regularly see Melbourne based gardeners make, and suggestions in avoiding making them yourself.
1. Transplanting carrot seedlings
The edible part of the carrot is the long tap root. When carrot seedlings are transplanted, you often damage this taproot. The result is forked and or twisted carrots! Always grow root crops such as carrots from seed. Read more about growing carrots here.
Wonky carrots such as these are caused by transplanting seedlings rather than sowing seed directly into the garden.
Other tactics to help overcome forked or split carrots are:
Don’t over fertilise the soil. Carrots don’t like soils high in nitrogen. So, plant carrots in beds that have been previously used to grow heavy feeders such as brassicas or sweetcorn. I’ve written an article about crop rotation according to plant nutrient requirements here.
Break up heavy clay soils to enable the taproot to easily grow down deep, with little resistance
Seed selection is critical. Plant a variety less prone to forking. I’ve had great success with planting the variety “Topweight Improved” and now plant this variety almost exclusively.
2. Selecting fruit trees on the wrong rootstock
Most fruit trees are propagated by grafting. This means the known variety of fruit is grafted onto a selected rootstock to help it cope with certain growing condition. You can use different rootstocks to control the following attributes of fruit trees:
Tree size (or vigour)
Time to fruiting (from the standard 7+ years, to as little as 2 years)
The ability of the plant to survive in certain soil types or climatic conditions
The ability to tolerate wet (or very dry) soils
Disease resistance
Stability of the plant and ability to withstand strong winds
Hardiness of the plant
Often, I see backyard orchards set up with fruit trees grafted onto full sized rootstocks. With the exception of citrus trees, I generally recommend that you plant trees on dwarf rootstocks.
Fruit trees grafted onto dwarf rootstocks have many advantages over standard sized trees:
They keep the fruit trees quite small, so they can be grown in small spaces, espaliered along driveways, on balconies and grown in large containers
They hardly (if ever) require pruning because they don’t keep trying to grow into a 10 metre high fruit tree,
They often fruit within 2 years instead of the usual 5 to 7 years.
A ladder is not needed to pick the fruit
Netting to protect the fruit from possums and birds is much easier and more cost effective.
In short, dwarf fruit trees make growing fruit easier!
Planting trees on dwarfing rootstock will reduce pruning and maintenance requirements. Plus you will harvest fruit much sooner than from tree grown on full sized rootstocks.
3. Using poor quality potting mix
Growing food in pots? The single most important thing to get right is your choice of potting mix.
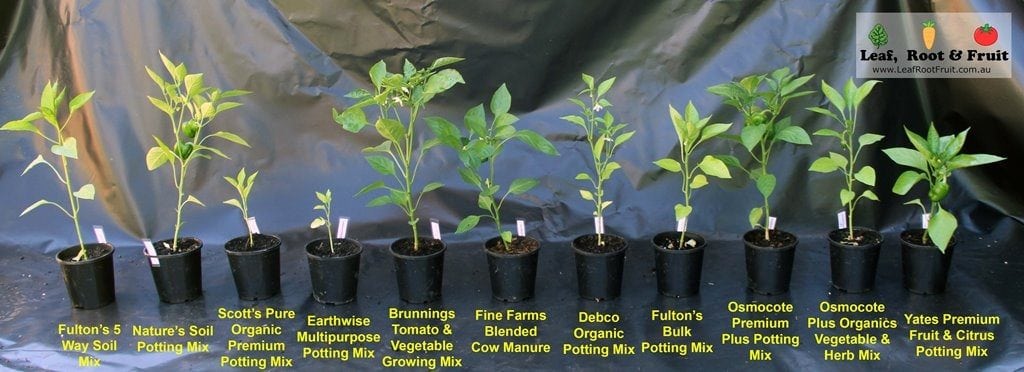
The results from our potting mix experiment. We picked the best plant for each type of potting mix.
The only difference between these seedlings is the potting mix that they are grown in. Some of the capsicum seedlings didn’t grow at all, other have flowers and even fruit on them!
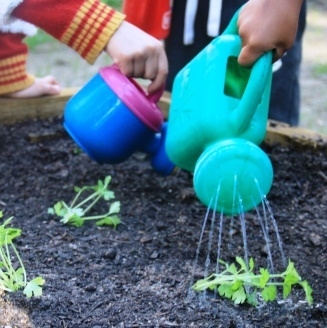
4. Not watering plants (or overwatering)
The next most important thing about growing food (in pots or the ground) is remembering to water them. Potted plants may require watering every day in summer (possibly even twice a day on really hot days).
Plants in small pots will dry out much faster than plants in large pots. So try and get the largest pots your budget can afford. Instead of planting a few herbs, each in their own small, individual pots, plant them all together in one large pot. They will create their own microclimate and survive the hot days much better.
In most instances, your potted plants will do better with a saucer underneath to catch water. This allows the water to move back up through the pot and then the soil, via capillary action (a bit like a mini wicking bed) and helps to stop the potting mix drying out.
Even plants in the ground are prone to water stress. Many plants are drought tolerant and can survive on minimal water. However, watering them will usually make them grow stronger and produce more. If your plants are not thriving, then it may be due to a lack of water. In Melbourne, winter is one of our driest seasons. So even though it is cold, don’t neglect to check the soil moisture levels and water occasionally.
Read more about irrigating your vegetable patch here.
5. Poorly designed garden beds that reduce access
Like it or not, humans are mostly the same, especially, when it comes to size. We all have an arm reach of around 60cm. It’s why kitchen bench tops are mostly the same size. If they were any bigger you couldn’t reach the centre!
The same principle applies to designing garden beds. Raised garden beds should be no wider than it is possible for you to reach across, to pick your produce. We recommend that the beds are no more than 1200mm wide, if you have access from both sides of the bed, or 600mm to 700mm wide if it is sited against a wall. I regularly conduct site consults for clients with huge raised garden beds 4 or 5 metres wide and long. It is impossible to tend or collect produce from these gardens without walking all over them and compacting the soil. Long and narrow beds are far better.
A rasied garden bed 1200mm x 2400mm makes great use of standard 2400mm long timber sleepers and redcues wastage.
If you are tall and the only person to be using the garden beds, then these can be slightly larger. If young children are going to be using the garden beds, then consider reducing these dimensions.
Similarly, bigger is not always better when it comes to height of your raised garden bed. Often clients will ask for a raised garden bed 80 or even 100cm high. In most instances this is due to limited physical capacity, where the client cannot bend over. That height is ok for growing small crops such as lettuces. However, if you want to grow tomatoes the story is very different. Sure, it is easy enough to plant your tomato seedling at 1 metre height, but as the plant grows, it will soon get to 1.5 to 2 metres tall from the top of the bed. Far better to bend over once to plant (or get someone to do it for you) and then not need the ladder all summer to harvest produce.
Read more about growing food in raised garden beds here.
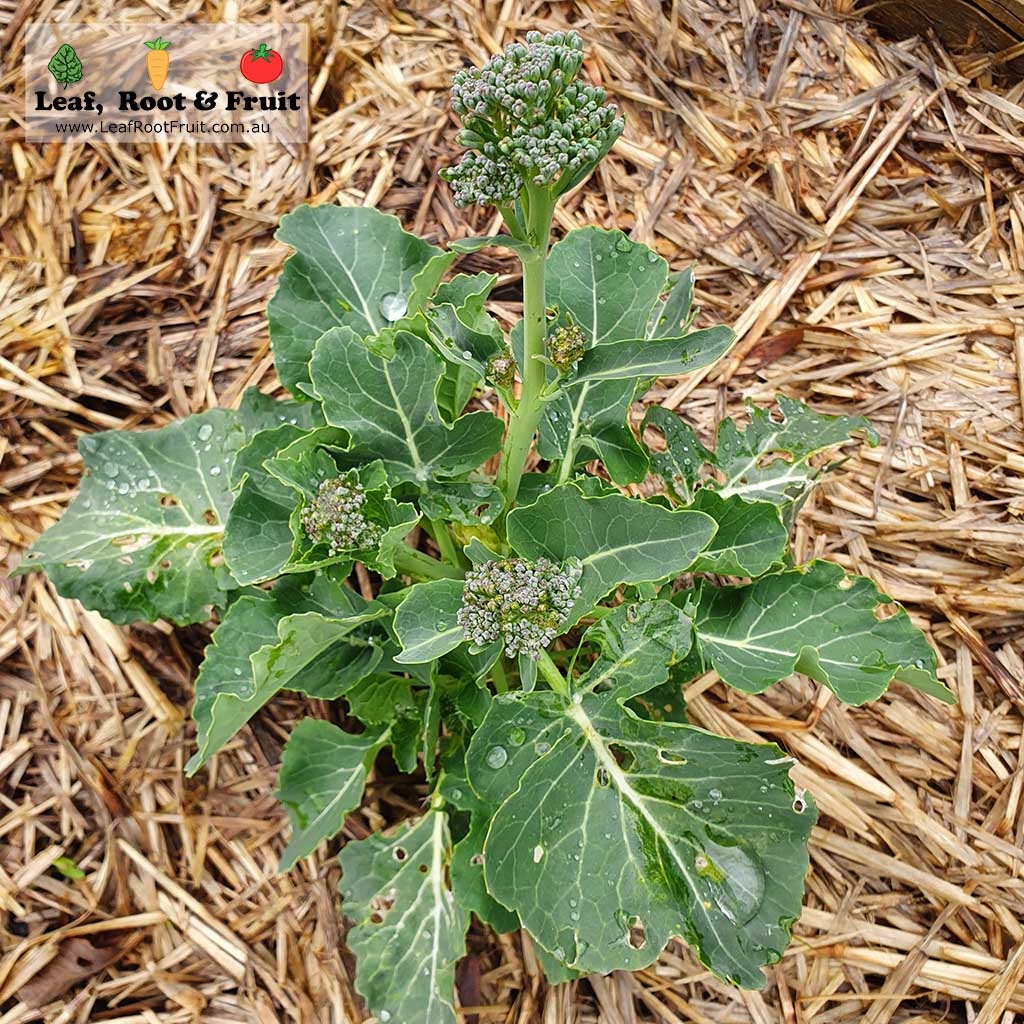
6. Planting stressed brassica seedlings
Stressed Brassica seedlings leads to plants bolting (flowering) early and tiny heads, such as this broccoli.
In spring I see social media flooded with images of small stunted cauliflower and broccoli heads. Well meaning gardeners advise that the grower should have fed the plants more, or provide them with Epsom salts, or all manner of incorrect and sometimes dangerous advice.
However, the problem usually occurred right back when the plants were transplanted. Brassica seedlings (which also includes cabbages and Brussels sprouts) hate to get root bound or stressed (eg through the potting mix drying out). Large seedlings purchased from hardware chains are likely to be already stressed and will quickly bolt to seed.
It will not matter how much TLC you give brassica seedlings after they become stressed, it is too late! Come spring, you will have very small plants with a very small broccoli or cauliflower head. So, if you are purchasing brassica seedlings grab the SMALLEST plants you can find. Aim to purchase seedlings with only one or two true leaves. More on what to look for here.
Better still raise brassica plants from seed yourself. I have been experimenting with with sowing directly into the garden bed with some great results. You could also start them in small pots and transplant them when they are very young (when they only have one or two true leaves). Just don’t let the seed raising mix dry out, or allow the plants to become root bound. If you see the roots coming out of the holes in the bottom of the pot then time is nearly up to transplant.
See my autumn planting guide for more hints and tips on planting Brassicas and other crops in March, April and May.
7. Incorrect pruning (especially pruning at the wrong time of the year)
Trees naturally balance the mass of their roots underground to the mass of the leaf story above ground. Pruning a tree leads to an imbalance of roots compared with leaves. So the tree compensates by growing lots more leaves to balance itself again.
When we prune a tree during its dormancy in winter, the tree wakes up (breaks dormancy) in spring and spends the rest of the growing season trying to regain balance. This results in prolific growth at the top of the tree, often in the form of watershoots. All this vegetative growth is at the expense of fruit. When you prune a tree in winter, rather than promoting the growth of fruit, you’re just promoting the growth of more leaves to be pruned next winter. What a waste of time and effort!
Heavy pruning in winter can result in many vigorous watershoots. This vegetative growth will be at the expense of fruit.
Instead, when you prune in summer, the tree immediately responds by trying to balance itself. However, this is only until it becomes dormant in autumn. After the dormant winter, when it wakes in spring, it goes back to focussing on producing fruit (instead of growing leaves as caused by winter pruning)
Winter pruning is used to train a tree to a particular shape, or to encourage substantial growth. Winter pruning is only recommended for newly planted trees, until the tree has achieved the desired height and shape. Ideally, established fruit trees are pruned in late summer. I recommend summer pruning is done soon after the fruit has been picked from the tree.
Do you have a large fruit tree that you wish to keep small? Then this post has a few strategies for you to try.
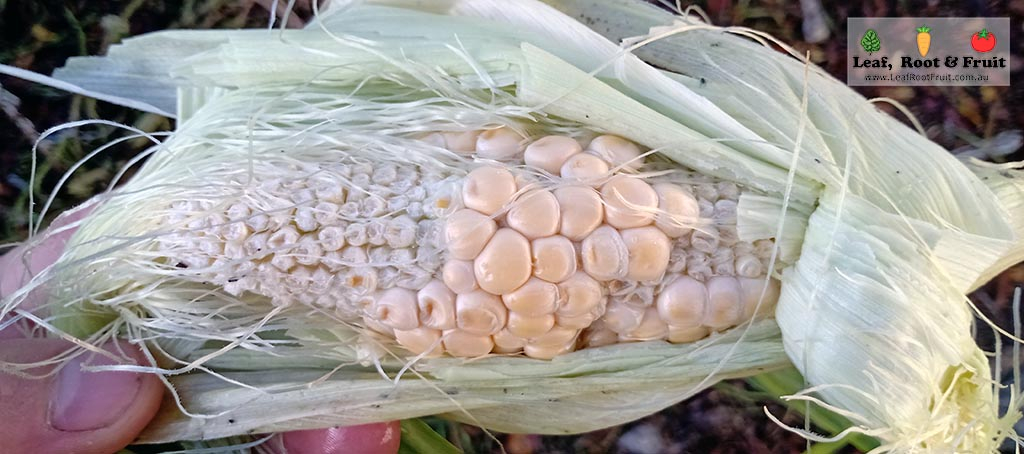
8. Growing a small crop of sweet corn
Good quality sweet corn cobs rely on great pollination. Each of the silks hanging out of the end of the cob links to one of the kernels inside the cob. Each kernel need to be pollinated by the male flowers on top of the plants. If the kernels aren’t pollinated (by the wind), then they don’t swell and fill with the delicious sugary sweetness.
If you grow only a few sweet corn plants, then it is unlikely that you will have great pollination.
Poor pollination can lead to corn cobs with many undeveloped kernals. Good pollination is critical to growing great sweetcorn cobs.
Here are a couple of tips I recommend to ensuring you grow great sweet corn:
Plant in blocks (not long rows)
Plant at least 30 corn plants (I have seen successful crops grown with fewer numbers, but pollination is not always great with less than say 24 plants)
When diagnosing compost problems, there are two main symptoms you can look for:
Compost is too dry and not breaking down.
You might find that your compost is dry and potentially full of ants. Generally, dry composts take a long time to break down. The reason for this is that the carbon : nitrogen ratios are out of balance and there is too much carbon in the compost. Usually this is caused by adding too many sticks and other coarse matter to the compost.
To correct this problem, add more nitrogen to the compost!
Compost is a wet, stinky sludgy mess
Compost should smell nice. If it stinks it is likely to be anaerobic and proliferating microbes that are not so great for your garden. Adding oxygen can help improve the situation but it is best to prevent the issue in the first place. The reason for a wet, stinky form of compost is that there is too much nitrogen, often due to too many kitchen scraps being added, without coarse carbon-based materials.
To correct this, add more carbon to the compost!
See my blog post on compost for more information on how to correct these issues. This post discusses how to use your precious compost in the vegetable patch.
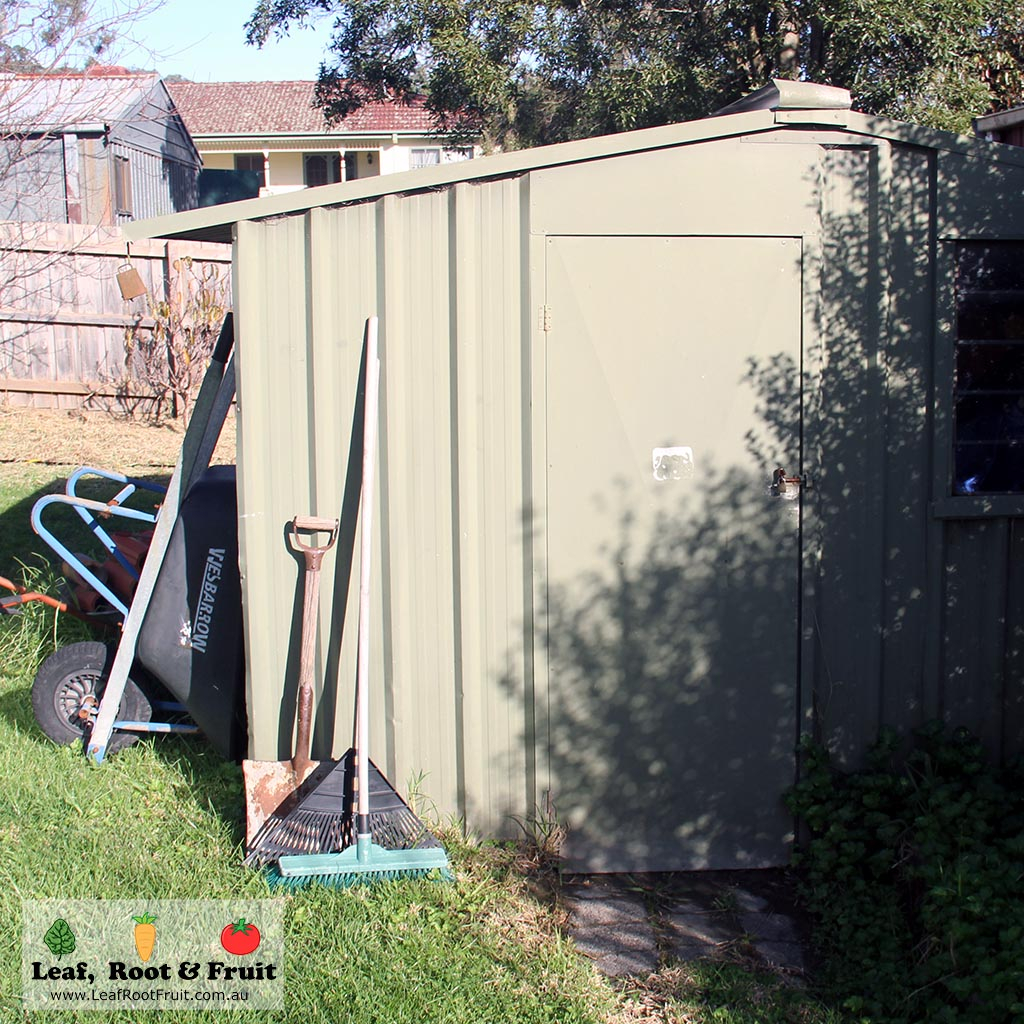
10. Putting the garden shed in the sunniest spot
I run gardening consults to help gardeners maximise their productivity in the garden. During the consult, I can help you analyse the site and work out a rough plan for what can go where. Far too many times I have been booked for a consult and arrived on site to be told “We’ve put the garden shed in, so now we are ready to design the garden”. Too often, the garden shed has been located in the sunniest spot in the garden, the best spot for growing vegetables!
Careful site analysis and design should be done before the shed is installed, not after.
When working out the layout for your backyard, you need to spend some time analysing the site. Work out where the sunny spots are, and where there is full shade. Try and analyse how you use the site, how you move through it, access, paths both for feet and wheelbarrows etc. Then start designing, but looking at the space as a whole. Put the shed somewhere you can access it easily, but also, if possible, in a shady spot. Design paths with good access, then look to what trees to place where? Fungal prone trees such as apricots, need to receive morning sun. Hardy trees such as plums can go anywhere, so place them last in your design.
How many of these avoidable mistakes have you made in the past?
Want more information about growing food?
If you’re new to edible gardening, I suggest you read my Vegetable Patch from Scratch series before starting a project. It might save you a bit of time and frustration by steering you away from preventable crop failures. It is popular with both novice and seasoned gardeners alike.
The series covers everything you might want to know about growing vegetables.
Hi,
Your list of garden mistakes is certainly interesting. The entry on pruning trees was proably the most interesting for me. I have been pruning trees in the winter and a little in the summer. The info you provide will be relevant later on, when the trees are more established. I am also interested in the entry about rootstocks. My intention – if possible – is to have one of my white mulberry trees grafted onto dwarfing rootsock. They currently sit in large pots, getting bigger each year. I am pleased to say that I make a point of adding carbon to my compost bin. Its a tumbler with vents and I keep a tub for liquid runnoff underneath. The compost itself is not stinky. It smells fine. Perhaps a few too many worms, which I distribute throughout my garden. The liquid runnof however, which often mixes with rain, is stinky. This may be because it sits in the tub for quite a while. I am not sure if the liquid runnoff should be poured down the drain or used in the garden. I have mixed it with even more water and used it reluctantly, mostly on grassed areas in a nearby public garden. The grass has survived! A neighbouring pine tree however may have inadvertently been affected. It is now recovering. Do you care to comment?
Unfortunately there aren’t great dwarfing rootstocks for Mulberries. They are normally grown from cuttings, rather than grafted.
The runoff from your tumbler will be packed full of nutrients and microorganisms that will be great for your garden. The reason why it smells is that you still don;t have enough carbon in your tumbler. Therefore nitrogen is being leached out in the liquid runoff where it is fermenting in the tub underneath (resulting in the smell). It will be similar to “worm wee” in that it can be diluted and watered onto your garden to give your plants an extra kick along. I very much doubt that your “fertilizing” the grass in the public space had any effect on the pine tree. As for the worms… you can never have too many worms – especially in a compost bin. They are accelerating the decomposition process and helping to grow a magnificent flora of microorganims that will help your garden.


Hi,
Your list of garden mistakes is certainly interesting. The entry on pruning trees was proably the most interesting for me. I have been pruning trees in the winter and a little in the summer. The info you provide will be relevant later on, when the trees are more established. I am also interested in the entry about rootstocks. My intention – if possible – is to have one of my white mulberry trees grafted onto dwarfing rootsock. They currently sit in large pots, getting bigger each year. I am pleased to say that I make a point of adding carbon to my compost bin. Its a tumbler with vents and I keep a tub for liquid runnoff underneath. The compost itself is not stinky. It smells fine. Perhaps a few too many worms, which I distribute throughout my garden. The liquid runnof however, which often mixes with rain, is stinky. This may be because it sits in the tub for quite a while. I am not sure if the liquid runnoff should be poured down the drain or used in the garden. I have mixed it with even more water and used it reluctantly, mostly on grassed areas in a nearby public garden. The grass has survived! A neighbouring pine tree however may have inadvertently been affected. It is now recovering. Do you care to comment?
Hi Anitsa,
Unfortunately there aren’t great dwarfing rootstocks for Mulberries. They are normally grown from cuttings, rather than grafted.
The runoff from your tumbler will be packed full of nutrients and microorganisms that will be great for your garden. The reason why it smells is that you still don;t have enough carbon in your tumbler. Therefore nitrogen is being leached out in the liquid runoff where it is fermenting in the tub underneath (resulting in the smell). It will be similar to “worm wee” in that it can be diluted and watered onto your garden to give your plants an extra kick along. I very much doubt that your “fertilizing” the grass in the public space had any effect on the pine tree. As for the worms… you can never have too many worms – especially in a compost bin. They are accelerating the decomposition process and helping to grow a magnificent flora of microorganims that will help your garden.
Good Luck & Happy Gardening
Duncan